HDR Imaging: What is an HDR image anyway? 📷
We all have noticed how capturing images with the sun (or any bright objects) in the background usually doesn’t turn out well. The image comes out to be either too dark or too bright depending on the focus. Let’s try to understand why this happens and how this can be solved.
There are a lot of key concepts that revolve around the study of HDR images -
- Dynamic range
- Image exposure
- Shutter speed, Aperture, ISO
- Image bracketing
- Merging LDR images
- Image encoding
- Camera response function
- Linearisation
- Gamma correction
- Tonemapping
- Visualising HDR images
Dynamic Range
Dynamic range of a scene refers to the range of light intensity that encompasses a scene. It can also be defined as the ratio of light (maximum measurable brightness) to dark (minimum measurable brightness) in an image.
To get some context of the how brightness can be quantised, the range of light intensity is 0 to infinity, with zero being the darkest and infinity being the brightest source there is (☀️) .

No camera is able to capture this complete uncapped range of illuminance in a scene. Therefore, images turn out to be either too bright (overexposed) or too dark (underexposed). These images are called Low Dynamic Range (LDR) images . For images that turn out too bright, it is only the brighter subrange (of the infinite range) that the camera is able to capture, and correspondingly for the darker images, only the lower subrange is captured.
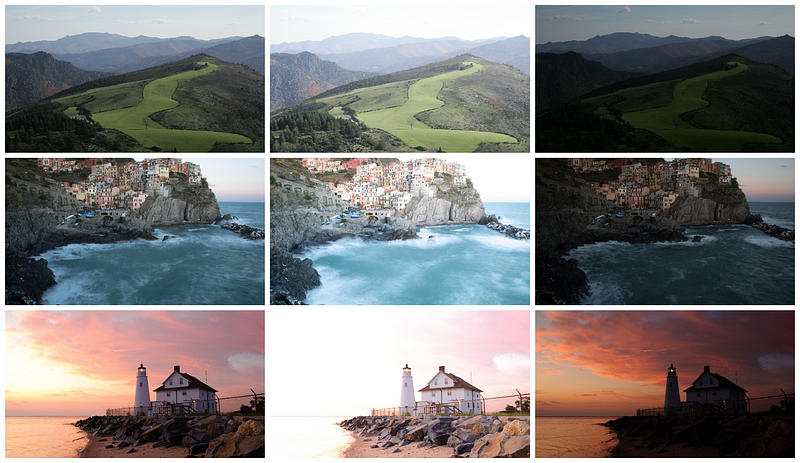
Image Exposure
The amount of light entering the camera (and thus, the image) is called the exposure. The exposure of the image can be controlled by three settings of a camera — the aperture, shutter speed and ISO.
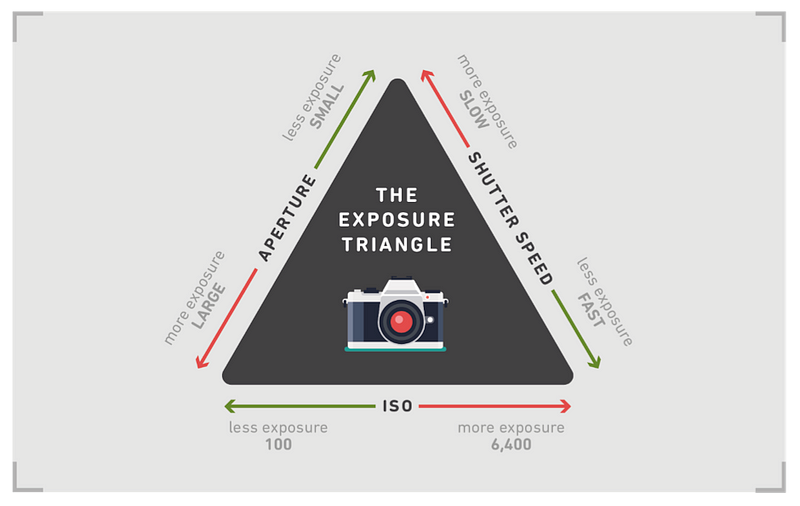
Aperture: The area of the camera lens through which the light can come in.
Shutter speed: The speed with which the shutter of the camera closes. As the shutter speed increases, the amount of light entering the camera decreases, and vice versa. It also improves the sharpness of an image.
ISO: Sensitivity of the camera sensor to incoming light.
I found this nice analogy here, between the camera settings and a bucket left out in the rain.
In photography, the exposure settings of aperture, shutter speed and ISO speed are analogous to the width, time and quantity in the discussion above. Furthermore, just as the rate of rainfall was beyond your control above, so too is natural light for a photographer.
Back to dynamic range. A single image captured from the camera can not contain the wide range of light intensity.
This problem can be solved by merging images captured at multiple exposure values. How this helps is that the overexposed images work well for the darker regions in the image, and the underexposed images are able to tone down the intensity in the extra-bright regions. Different regions of the image are captured better at different exposure values. Therefore, the idea is to merge these set of images and to recover an image with a high dynamic range (HDR).
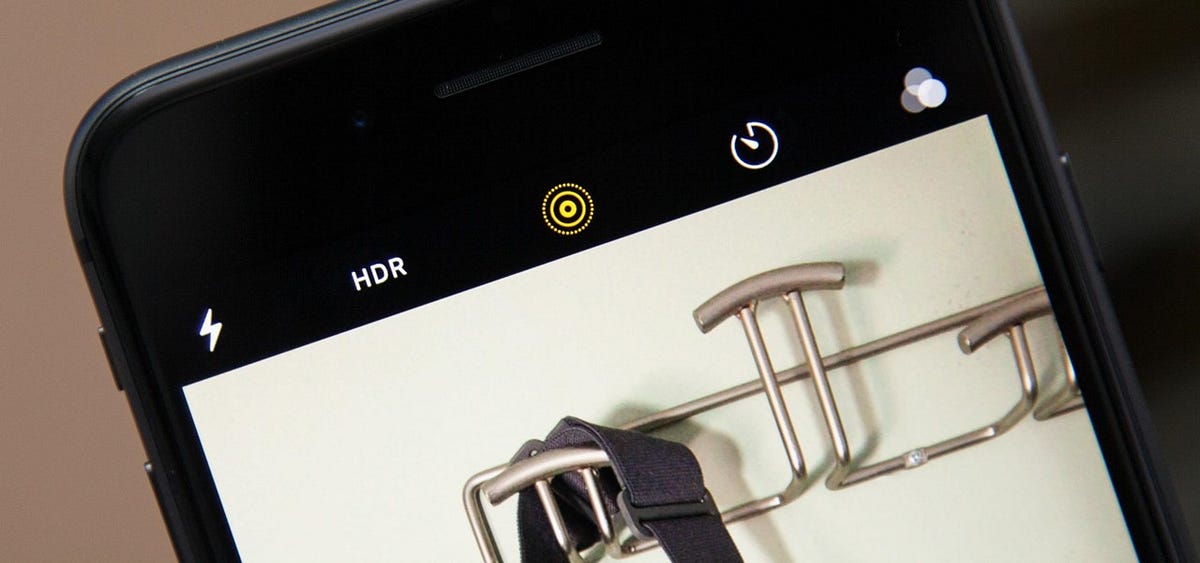
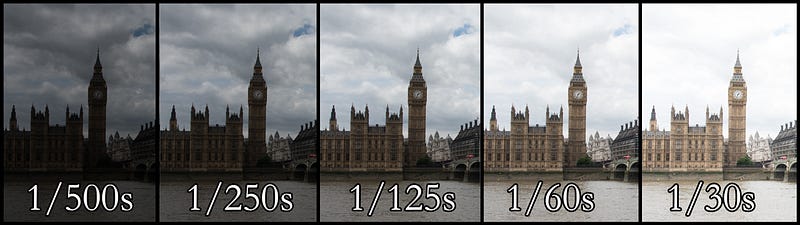
Image bracketing
Bracketing refers to capturing multiple images of the same scene with different camera settings. It is usually done automatically by the camera. What happens when you use the HDR feature on your smart phone is that the phone captures 3 (usually) images at three different exposure times (or exposure values) in quick succession. The lower the exposure time, the lesser the amount of light that gets in. These three images are merged by the camera software and are saved as a single image, in a way that the best portions of each image make it to the final image.
The funny thing here is that the image that is saved on your phone after the merging happens, is still not (technically) an HDR image. This is where the image encodings come into the picture (and also tonemapping — which we’ll discuss later).
Image encoding
Commonly, the images that we see on our phones and computers, are 8-bit (per channel) encoded RGB images. Each pixel’s value is stored using 24-bit representations, 8-bit for each channel (R, G, B). Each channel of a pixel has a range of 0–255 intensity values.
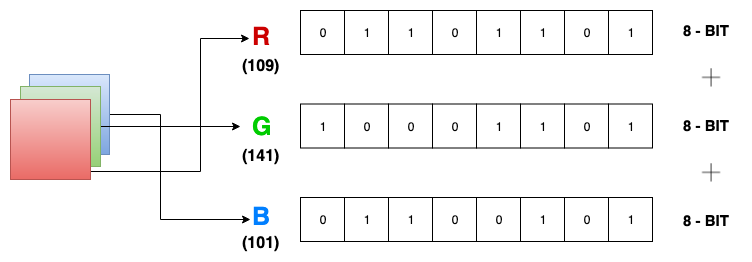
The problem with this encoding that it is not capable of containing the large dynamic range of natural scenes. It only allows a range of 0–255 (only integers) for accommodating the intensity range, which is not sufficient.
To solve this problem, HDR images are encoded using 32-bit floating point numbers, for each channel. This allows us to capture the wide uncapped range of HDR images. There are various formats for writing HDR images, the most common being .hdr and .exr. All HDR images are 32-bit encodings but not all 32-bit images can be HDR images.
Camera Response Function (CRF)
CRF is a function that shows the relationship between the actual scene irradiance and the digital brightness values in the image. It is also called as the Opto-electrical transfer function. Camera companies don’t provide their CRFs and consider it as proprietary information.
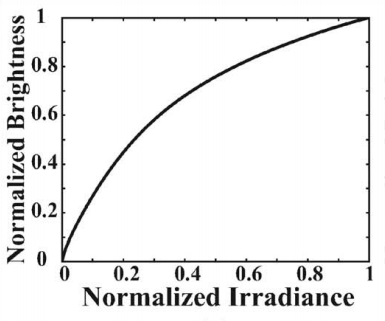
In an ideal world, the CRF should have a linear graph — meaning, the brightness value of the pixels in the image should be directly proportional to the actual irradiance in the scene. This is true for HDR images, but not for the usual images where the brightness values are altered to be able to contain them in a finite range. The more important reason for conventional images being de-linearised depends on how display devices work.
Back in the time of CRT (Cathode Ray Tube) displays, electrons were fired on a phosphor surface. The phosphor screen is known to emit photons upon being hit by accelerated electrons. However the brightness of the display didn’t vary linearly with the strength of the electron beam. This problem has been solved by modifying the incoming image/video source signals non-linearly in the direction opposite to the display’s non-linearity. By doing this, we can get a fair linear estimate of the natural scene brightness.
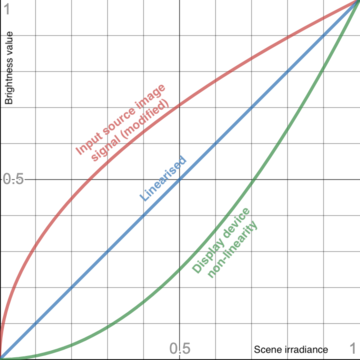
This de-linearisation of the source allows to compensate for a non-linear display. Display technologies have advanced but the non-linearity still exists in most devices. This de-linearisation is known as gamma correction.
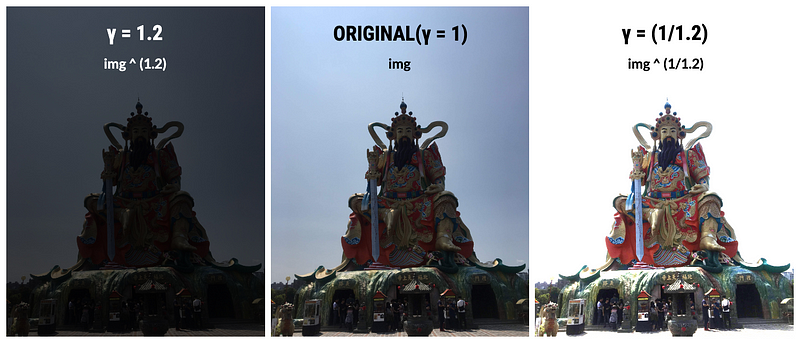
Gamma corrected image = image ^ γ
If the input image is x, then what a display device of gamma=1.2 shows is x^(1.2). Therefore, the input image is encoded as x^(1/1.2) so that the monitor converts it to x^((1/1.2) x 1.2) which is equal to x, the original image captured by the camera.
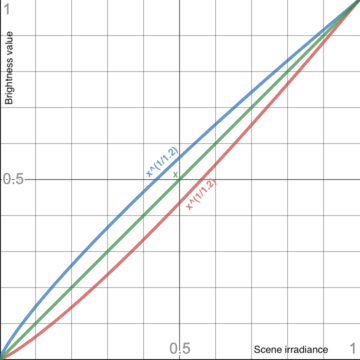
For most displays these days, images have to be encoded by a gamma value of 0.45 (1/2.2) because of a gamma decoding of 2.2 by the displays.
Gamma encoding is performed over a range of [0,1]. So images first have to be normalised by dividing by 255 and then again multiplying by 255 after the gamma operation. Powers of greater than 1 yield darker images whereas powers of less than 1 yield brighter image.
HDR photography (or any photography) is quite complex in a way that we need to think of three important aspects —
- How the actual scene is (ground truth / uncapped dynamic range)
- How the camera captures (bracketing and then merging)
- How it is displayed (tonemapping)
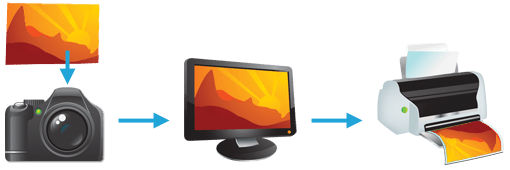
In the context of HDR imaging, we have discussed the first two points. Now let’s look at how HDR images can be displayed.
Tonemapping
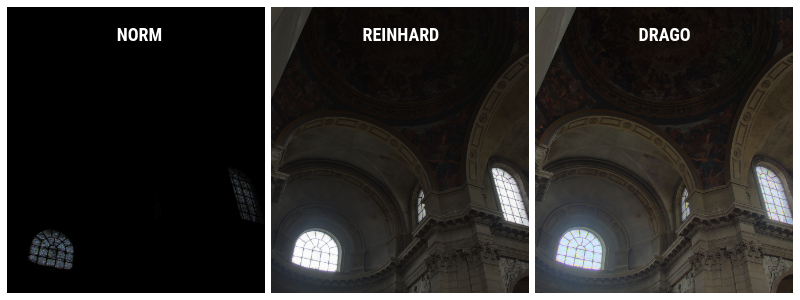
Most off the shelf display devices are incapable of delivering the wide uncapped range of HDR images. They expect the input source to be in the three-channel 24-bit (3x8) RGB format. Due to this reason, the wide dynamic range needs to be toned down to be able to accommodate it in the 0–255 range of RGB format. This can be done in several ways, some of which are-
- Conventional linear normalisation: This is the most basic way of bringing down the wide range of an HDR image.
tonemapped image = (img — img.min()/img.max() — img.min()) x 255
- Reinhard tonemapping: This is one of the most commonly used tonemapping algorithm that was shared in this paper.
tonemapped image = img/(1+img) x 255
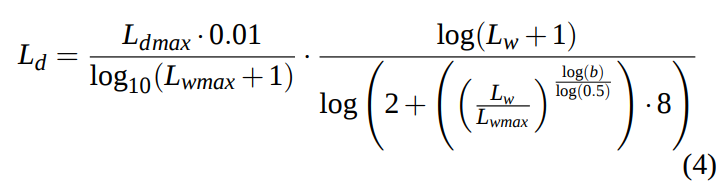
- Drago tonemapping: This tonemapper is a perception-based one that compresses the dynamic range using logarithmic functions “computed using different bases from the scene content”. The paper for this can be found here.
You asked for it
Ongoing research in generating HDR content
The conventional approach of generating HDR content is by merging multiple images captured at different exposures (bracketing). However, this approach is likely to create ghosting (blur) artifacts when there is movement between the frames. This has been solved by first aligning the neighbouring frame with the reference frame (middle frame) using something known as optical flow. That can be a topic for another blog post but for now we can think of it as a way to estimate the motion of objects (or pixels) that happens across frames by assigning a displacement vector to certain pixel positions.
There also has been work in generating HDR frames from singular LDR counterparts using Deep Learning. Neural networks are successfuly able to learn complex representations between the input and the output, and have thus performed quite well in learning the LDR to HDR mapping. These are some of the state-of-the-art methods for HDR image generation from a single image —
- HDRCNN: HDR image reconstruction from a single exposure using deep CNNs
- Deep Inverse Tone Mapping Using LDR Based Learning for Estimating HDR Images with Absolute Luminance
- ExpandNet: A Deep Convolutional Neural Network for High Dynamic Range Expansion from Low Dynamic Range Content
Here are some state-of-the-art Deep Learning based methods for HDR image generation using multiple LDR images —
- Deep High Dynamic Range Imaging of Dynamic Scenes
- AHDRNet: Attention-guided Network for Ghost-free High Dynamic Range Imaging
 Mukul Khanna
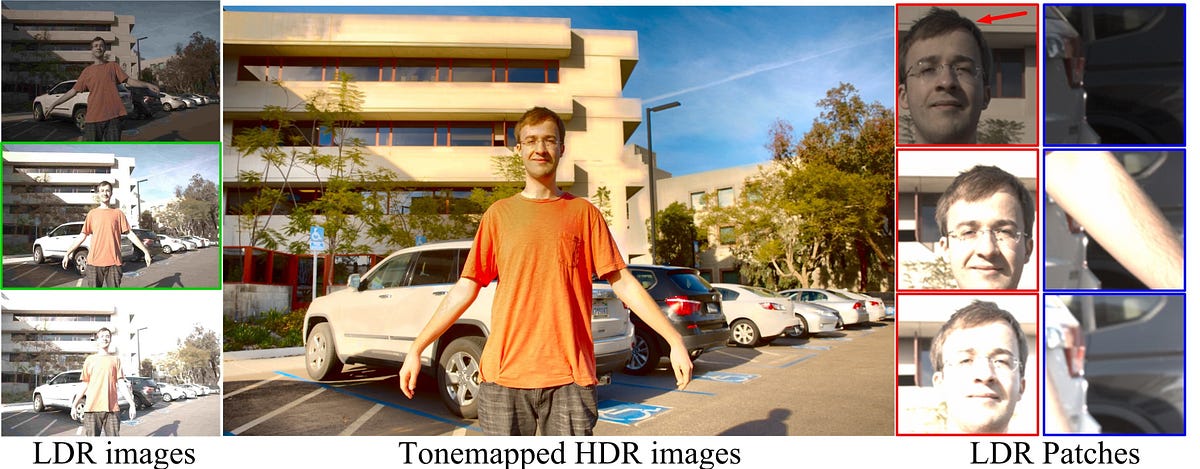
How to view HDR images
HDR images are stored as luminance maps and not as conventional RGB images and thus can’t be viewed using common image viewing applications.
MacOS allows you to view .hdr and .exr files using the Preview and Finder app. You can also use the OpenHDR website to visualise such images.
Thanks for reading.
For future blog posts, I would like to discuss about how operations can be performed on HDR images using Python, OpenCV and Numpy. I would also like to share the current scenario of research being done for HDR video generation.